The Real Reason Some Protectors Are Harder to Install Than Others
Every “how to install a screen protector” guide focuses on technique — cleaning, aligning, pressing. Almost none explain why some protectors are simply easier to get right than others before you even touch the screen. The difference lives in two design choices the packaging rarely spells out clearly: the adhesive layer and the installation mechanism.
| Mechanism | How it works | What it removes as a source of error | What can still go wrong |
|---|---|---|---|
| Silicone full-surface adhesive, no tray | Adhesive covers the whole back of the glass; you align by eye and lower it manually | Nothing — alignment is entirely manual | Crooked placement, dust trapped during the drop, no clean way to reposition |
| Edge-only adhesive | Adhesive runs only around the perimeter; center floats free until pressed | Slightly easier initial placement, since the center doesn’t grab immediately | Weaker long-term hold, more prone to edge lift and halo effects, especially on curved glass |
| UV-liquid adhesive | Liquid glue is dispensed, the glass is laid down, then cured with a UV lamp | Fills gaps and conforms to curved edges better than any solid adhesive | Hardest to execute cleanly — mistakes with liquid glue are difficult to undo once cured |
| Pull-tab alignment tray or cabin | A frame keyed to the phone’s edges holds the glass in a fixed position; you pull a tab to drop it | Manual alignment entirely — there’s nothing left to misjudge by eye | Kit only fits the exact phone model it was designed for; dust can still land during the pull |
Kits bundling a full-surface silicone protector with a pull-tab tray typically retail for $14.99 to $19.99 per current US listings, a few dollars above adhesive-only versions. For a first-time install, that premium buys back the one variable — alignment — that causes most failed attempts.
If a listing doesn’t mention a tray or cabin, assume manual alignment and budget the extra time. If it does, the hardest part of the job has already been solved before the box is opened.
Does a screen protector affect Face ID or fingerprint unlock? No, provided it’s a standard 0.2mm to 0.33mm tempered glass protector correctly aligned over the sensor cutouts. A misaligned or unusually thick protector can occasionally interfere with under-screen sensors; that’s a placement issue, not a screen-protector-category issue.
Flat Screen or Curved Screen Changes the Job
A flat display is the easy case: full-surface silicone adhesive, a tray if one’s available, done. A curved-edge display is a different job. Silicone adhesive alone often can’t hold curved edges down evenly, which is why curved-screen protectors more often use edge-only or UV-liquid adhesive, both harder to execute cleanly on a first attempt. If a phone has a curved edge, expect the install to take longer and tolerate more visible imperfection at the edges even when done correctly.
The Bubble-Free Sequence, Compressed
Clean, dry, lift dust, align, press, in that order, since skipping or reordering any one step is what causes most failures.
- Clean the screen with an alcohol wipe in circular motions, then wait 20 to 30 seconds for the alcohol to evaporate before the next step.
- Dry with a lint-free microfiber cloth, checked at a low angle against a light source for streaks.
- Lift dust with the adhesive dust sticker: one firm press per spot, no sliding, since sliding redeposits lifted particles.
- Align using the tray if included, or the top speaker cutout and one long edge if applying manually; lower slowly, don’t drop it flat.
- Press from the center outward toward each edge, never edge-to-center, which traps air in the middle with no way out.
Do I need to turn my phone off before installing? It’s not required, but a black, powered-off screen makes dust specks far easier to spot under light, and it prevents accidental touches mid-install.
Air Bubble or Dust Bubble? Test It Before You Fix It

Press gently on the bubble. What happens next tells you which fix applies; trying the wrong fix wastes time and risks a scratch from a card or squeegee.
| Type | Test result | Fix | Timeframe |
|---|---|---|---|
| Air bubble | Moves or flattens under gentle finger pressure | Work it toward the nearest edge with a microfiber-wrapped card, or simply wait | Usually resolves in 24 to 48 hours |
| Dust bubble | Stays fixed regardless of pressure | Lift the nearest corner with a thin card or tape, remove the particle with the dust sticker, re-lay from that edge | Will not resolve on its own; act before the adhesive fully sets |
| Can’t tell yet | Just applied, still settling | Wait a few hours before testing; very fresh installs can look worse than they’ll end up | Re-test at the 24-hour mark |
This split holds because a trapped dust particle physically blocks adhesive contact around it, while silicone adhesive gradually flows and fills micro-gaps where only air, not debris, is trapped.
The Mistakes That Actually Cause Failures
- Skipping the dust sticker. The wipe removes oils, the cloth removes streaks, neither removes particles. This step alone prevents most dust bubbles.
- Applying before the alcohol evaporates. Residual moisture blocks adhesive contact and creates its own bubbles.
- Touching the adhesive side. Finger oils reduce adhesion in that exact spot, even briefly.
- Pressing edge-to-center instead of center-out. This traps air with nowhere left to go.
Should I install a screen protector in a steamy bathroom? It can marginally reduce airborne dust, but a closed, dry, still room does the same job without the moisture risk to the adhesive; see the callout above for why the trick is only a partial fix.
Camera Glass Needs the Same Prep
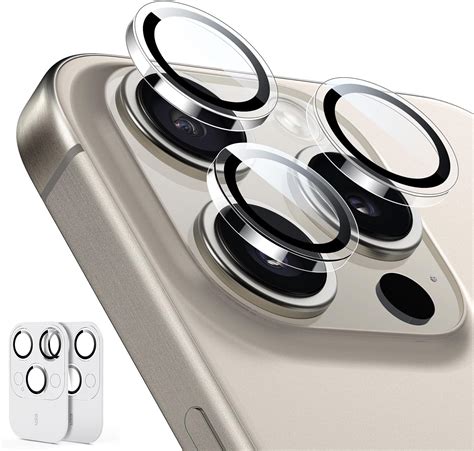
Camera lens covers get almost none of the attention screen protectors do, yet the raised lens housing on many current phones sits more exposed to scratches from tables, bags, and keys than the display does. The same clean-align-press sequence applies, and it’s worth doing in the same session as the screen protector rather than as an afterthought later.
When to Reinstall and When to Let It Go

Not every flaw is worth fighting. A single small air bubble at the very edge, invisible at normal viewing angles, usually isn’t worth a reinstall since it’ll likely settle within two days regardless. A dust bubble in the center of the screen, or a visibly crooked protector covering part of a camera cutout, is worth lifting and redoing immediately, before the adhesive fully sets and lifting becomes harder. Tempered glass tolerates two to three careful reapplications before the adhesive weakens enough that full contact isn’t achievable again; past that point, a fresh protector is the more reliable fix than another attempt on the same piece of glass.
Can I reuse a screen protector if I mess up the first try? Yes, within limits. Lift carefully from a corner, avoid touching the adhesive, remove any dust with the sticker, and re-lay. After two to three removals the adhesive typically weakens enough that full adhesion is no longer achievable, and a new protector installs more reliably than a fourth attempt on the same one.
A protector that goes on crooked, bubbled, or scratched from a card is still a solved problem for a few dollars and five more minutes. A cracked, unprotected display is not.